Setting up tools for CSS Art
In this article, we will set up an offline text editor and local development environment. Then we’ll show you how to set up an account to use an online IDE.

Introduction
This article is for beginners. You don’t require prior knowledge of the technologies discussed in the article.
We will show you how to set up VS Code in this article. We’ll set up our local development environment as well. If you prefer using an online IDE, refer to the online IDE section, where we’ll show you how to set up CodePen.
Offline Tool Set Up
Let’s go ahead and set up our offline tools. In this section, we’ll show you how to set up Microsoft Visual Studio Code, or commonly referred to as VS Code.
Subsequently, let's set up our local development environment. For HTML and CSS, this will not be a complicated process. It consists of creating a folder structure and putting some files in it.
VS Code
We will set up VS Code for macOS platform. For a step-by-step visual guide, refer to the official setup guide.
Overview of VS Code installation process.
- Download VS Code for macOS.
- Access downloaded archive.
- Extract archive contents.
- Put Visual Studio Code.app to Applications folder.
- Add VS Code to your Dock.
Jump to this article for details about VS Code and offline text editors.

Now that we have VS Code installed in our computer, let’s set up our local development environment.
Local Development Environment
A local development environment is not a complex setup. We only need to make a couple of files and folders.
Here’s an overview of the files and folders that we’ll be making.
- Project folder
For simplicity, we’ll name itproject-folder. This is where you’ll collect all your project files and folders. stylesfolder
We’re going to store our CSS files here.index.htmlfile
All our HTML code will go on to this file.styles.cssfile
Our CSS code will all be in this file.
Here’s a visual representation of your folder and file structure.
project-folder/ (also called the root directory)
|
|--- index.html (HTML file)
|
|--- styles/ (CSS folder)
|   |--- styles.css (CSS file)
|
On macOS, it looks like this.
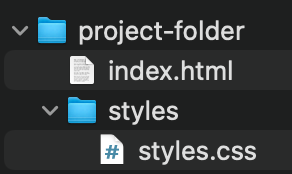
Caution for file, folder name casing and spacing
If you look at the name casing and spacing of our project folder and file, you will notice:
- they’re all in small caps
- words connected with a hyphen
Reasons for this are:
- Numerous computers, especially web servers, are case-sensitive.
For example, if you have a file namedstyles.cssand try to access that file from your HTML file asStyles.css, there’s a high probability that it may not work. This is because, with case-sensitive computers, it will treat them as two separate files. - Web servers, web browsers and programming language do not handle spaces consistently.
For example, if you put spaces in your filename, some systems may treat your filename as two separate file names. Some servers may insert%20(the character code for spaces in URLs) to replace the space in your filename. This will convertproject folderasproject%20folderand this will break your URLs. Get into the habit of using hyphens to separate your file name words.
Recommendation from MDN documentation.
It's better to separate words with hyphens, rather than underscores. The Google search engine treats a hyphen as a word separator but does not regard an underscore that way. For these reasons, it is best to get into the habit of writing your folder and file names lowercase with no spaces and with words separated by hyphens, at least until you know what you're doing. That way you'll bump into fewer problems later down the road.
In the subsequent sections we’ll be making our project folder, index.html and styles.css file.
Make project folders and files
Let’s make our folders first, then make two files after that. Here’s our workflow:
- Make
project-folderfolder. - Create
index.htmlfile. - Make
stylesfolder. - Create
styles.cssfile.
We’ll use VS Code to create the folders and files.

Step 1. Launch the app by clicking its app icon.
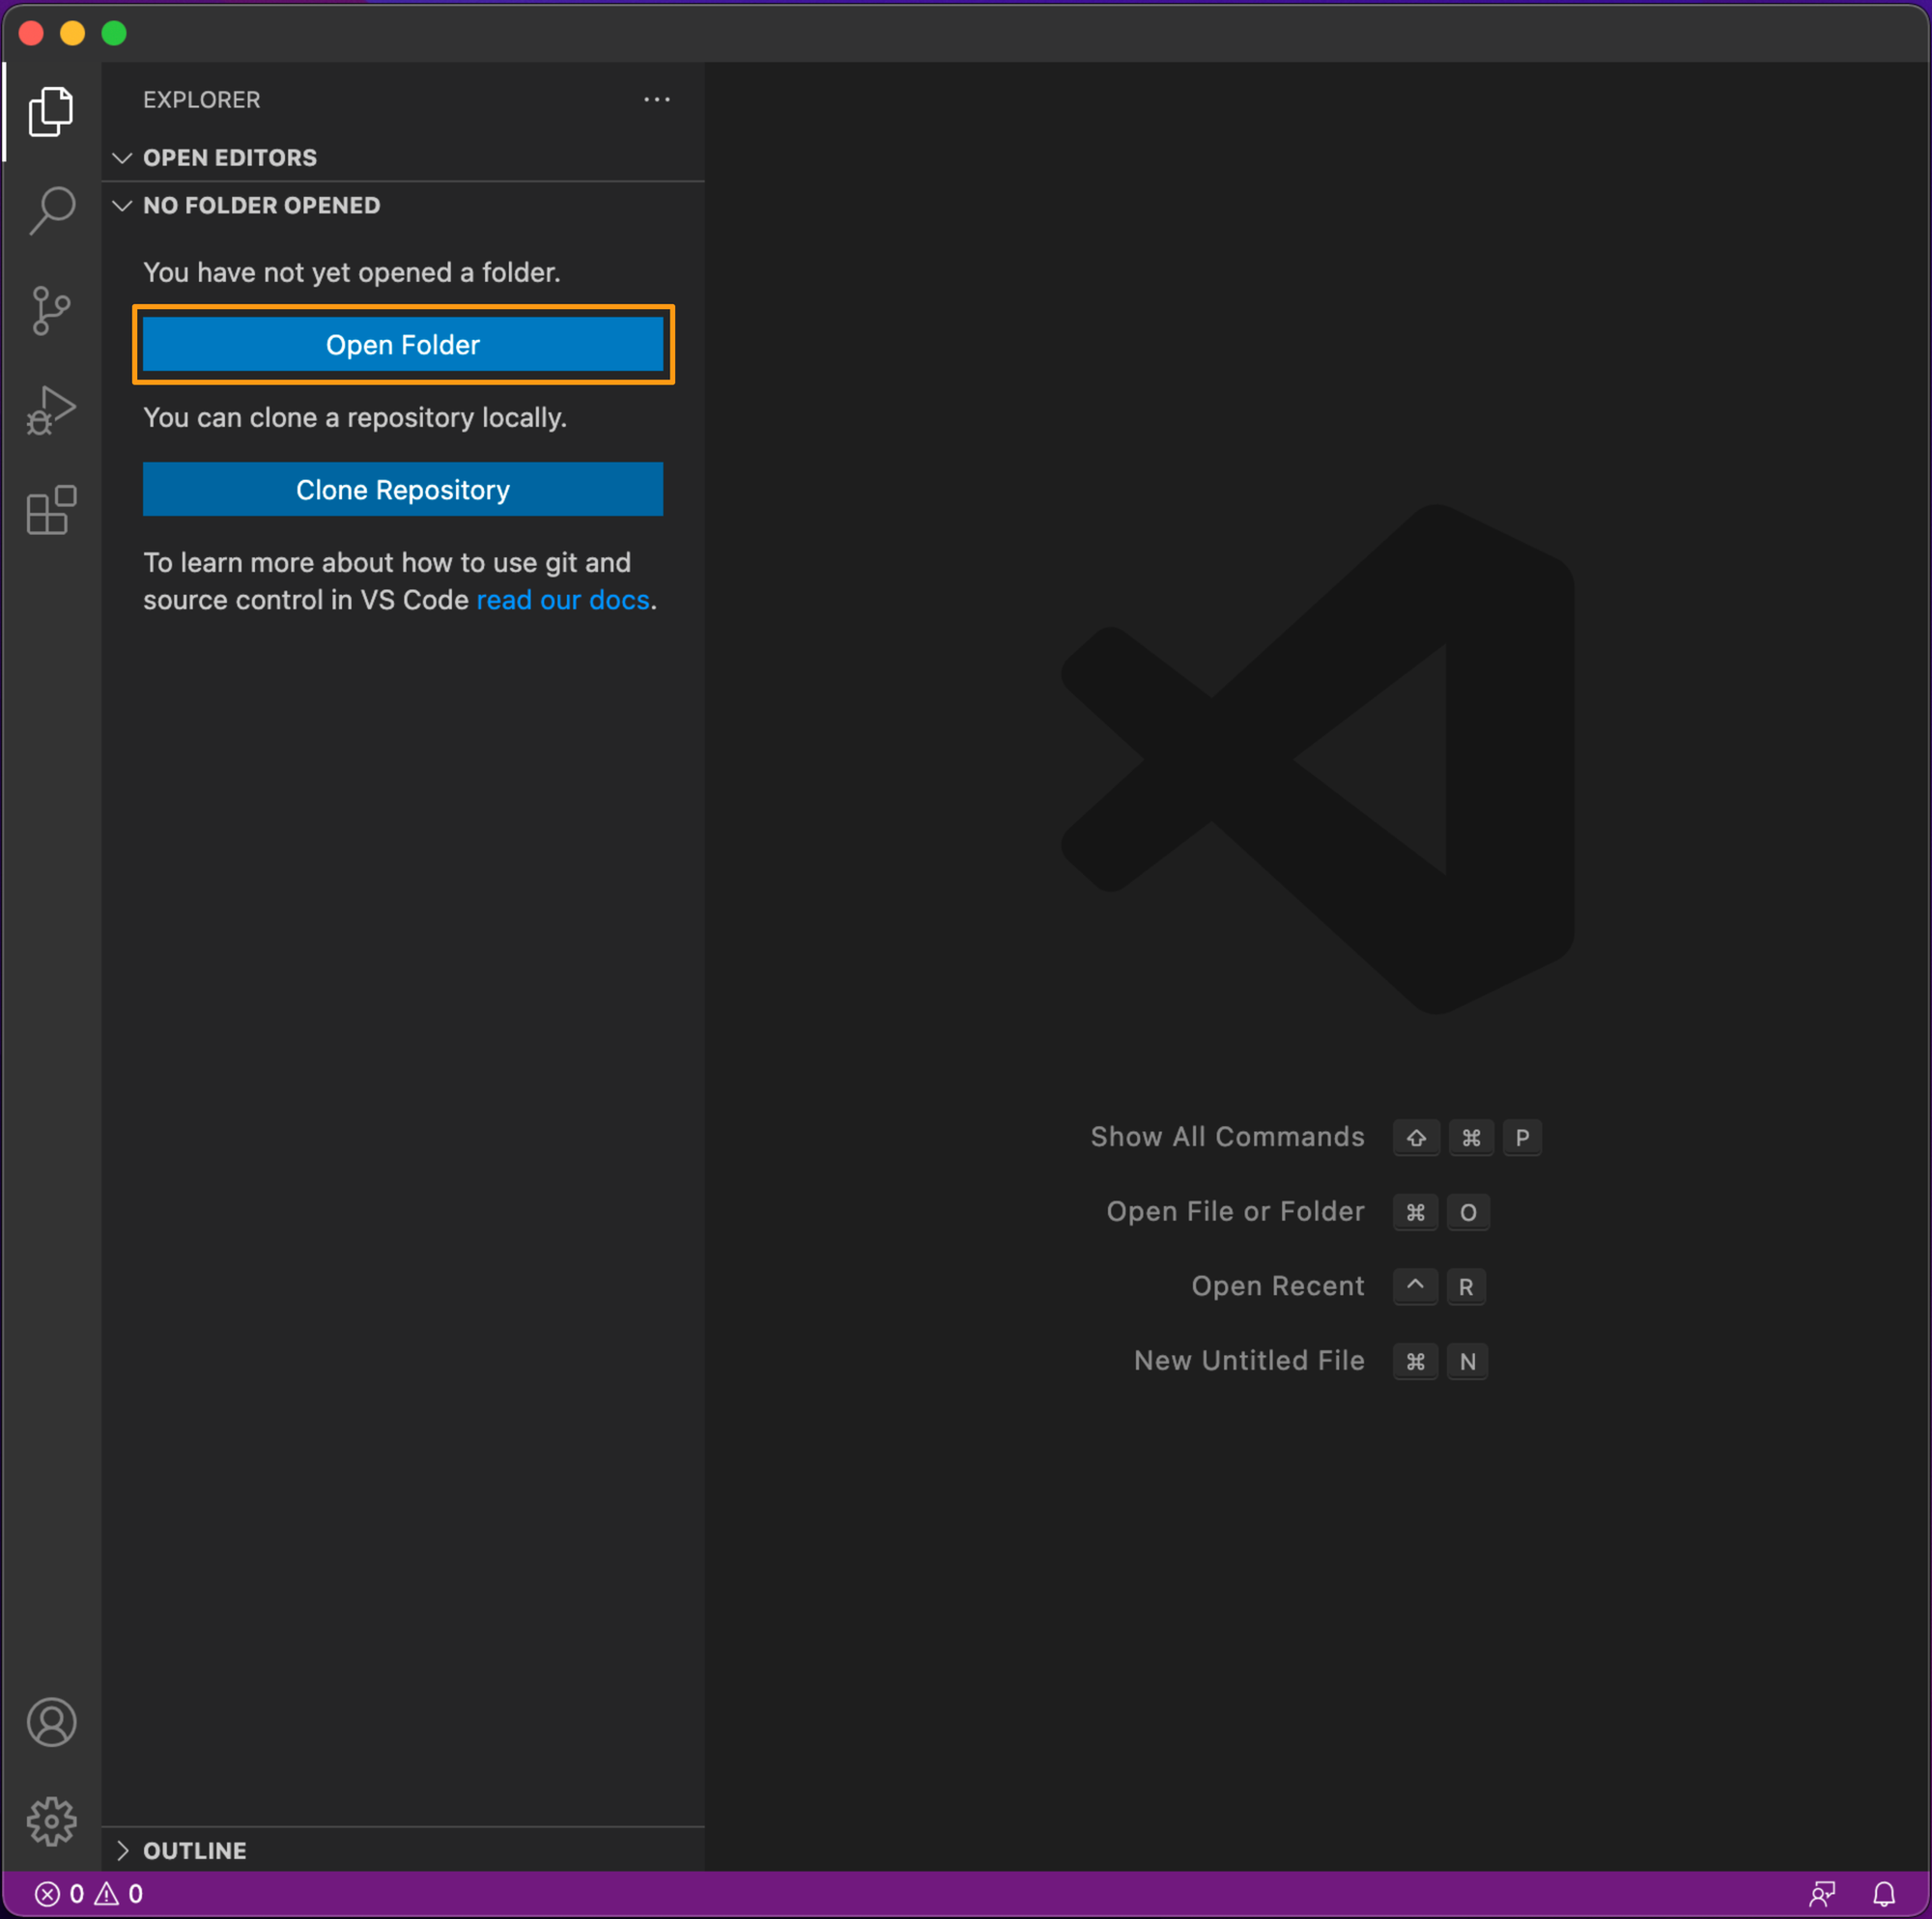
Step 2. In the Explorer pane, click on Open Folder.
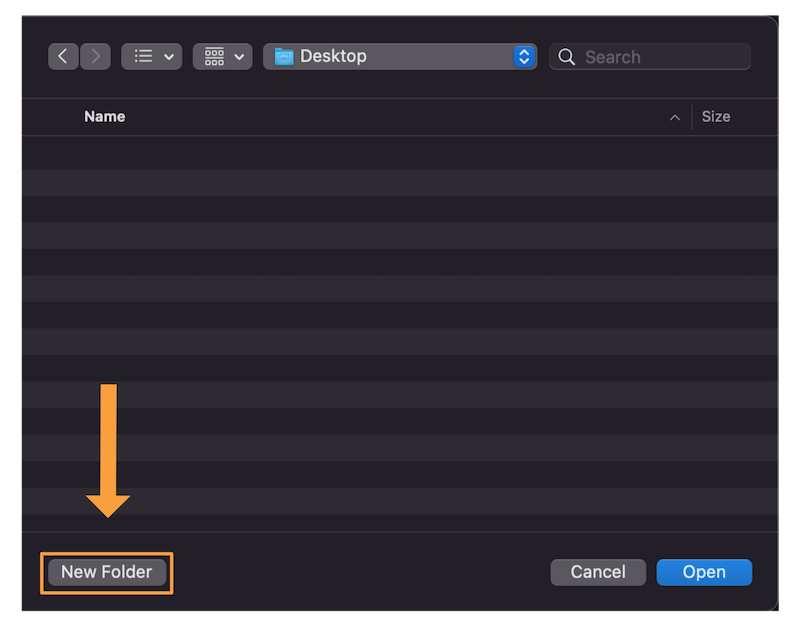
Step 3. Click on New Folder button in the lower-left corner.
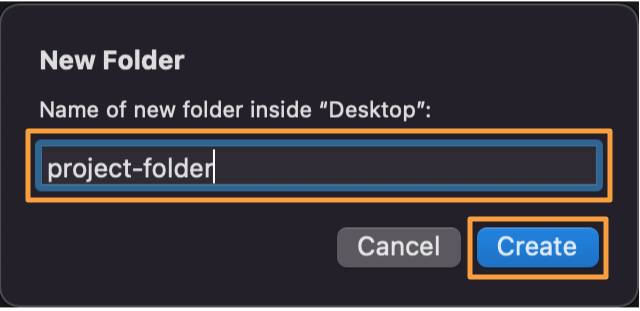
Step 4: Type project-folder for the folder name and click Create button.
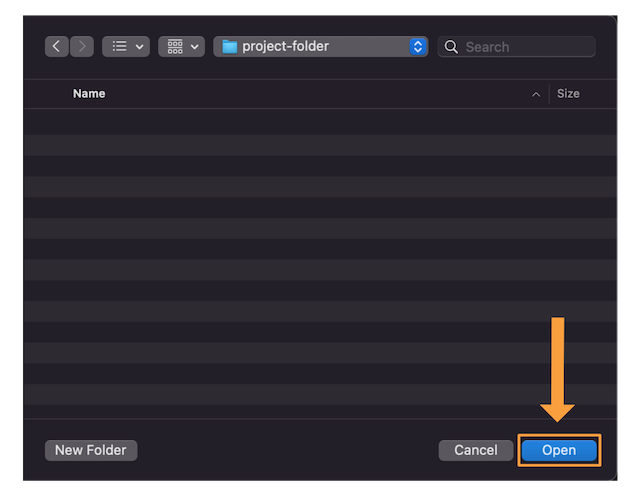
Step 5: Click Open button in the lower-right corner.
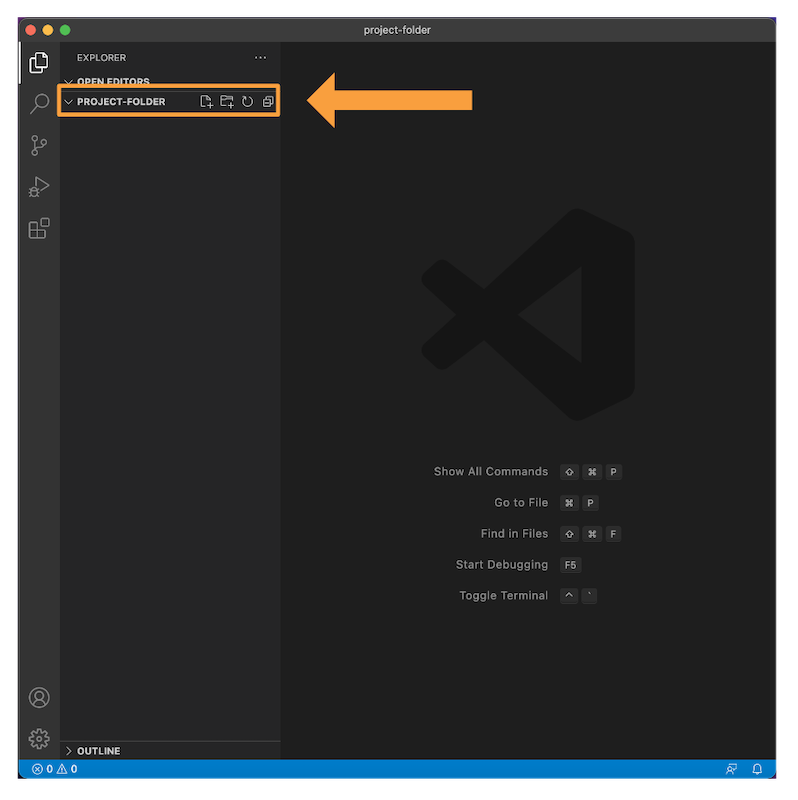
Step 6: In the Explorer pane, you should see project-folder in all caps.

Step 7: Click on New File button. Type index.html and hit enter key.

Step 8: Click on New Folder button.

Step 9: Type styles and hit enter key.

Step 10: Click styles folder to select it. Next, click New File button to create styles.css file.
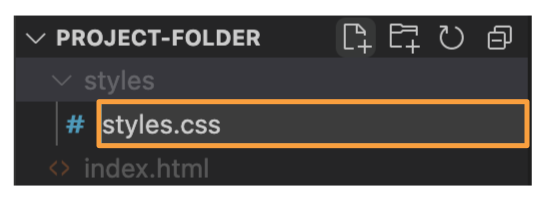
Step 11: Type styles.cssand hit enter key.
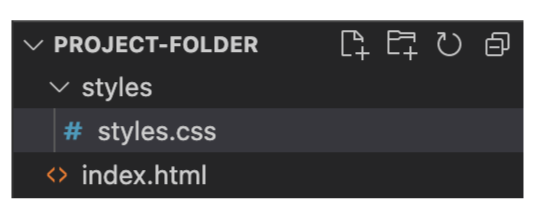
Step 12: All done! Great job
Online IDE
In the previous section, we set up VS Code and our local development environment. As a beginner, you may have felt that it was a lot of work to set everything up to make CSS Art. In this section, we’ll show you a less complex setup. Now, do take note that you need an internet connection to set up and use online IDEs. We will be using CodePen as our online IDE.
CodePen Set Up
CodePen is a great solution for creating CSS Art. It has a large community of designers and artists. You can browse through the galleries to find inspiration for all sorts of art and design.
From the CodePen about page:
👋 CodePen is a social development environment. At its heart, it allows you to write code in the browser, and see the results of it as you build. A useful and liberating online code editor for developers of any skill, and particularly empowering for people learning to code. We focus primarily on front-end languages like HTML, CSS, JavaScript, and preprocessing syntaxes that turn into those things.
Overview of our set-up work flow.
- Sign up for a CodePen account.
- Log in to your account.
- Create new Pen.
- Change Pen title to
project-folder. - Minimize JavaScript Editor.
Step 1: Using your web browser, head over to https://codepen.io.
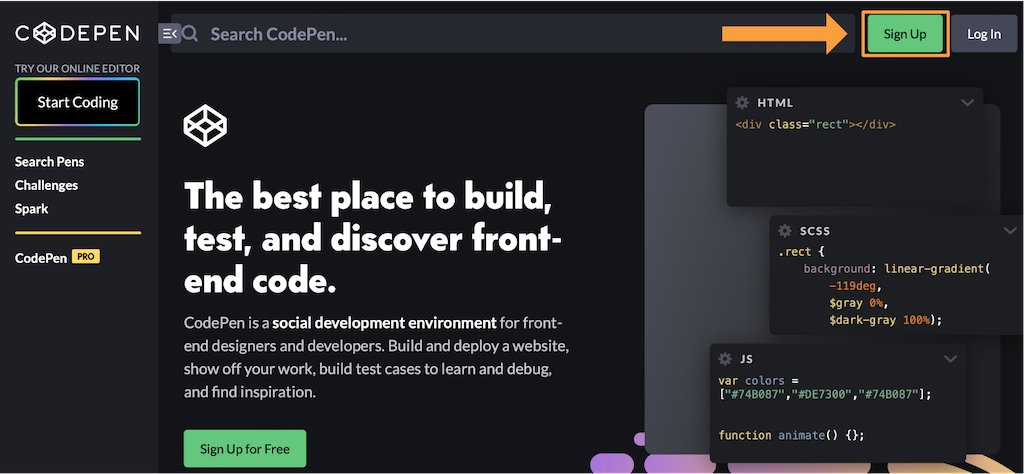
Step 2: Click on the Sign Up button in the upper right-hand corner.
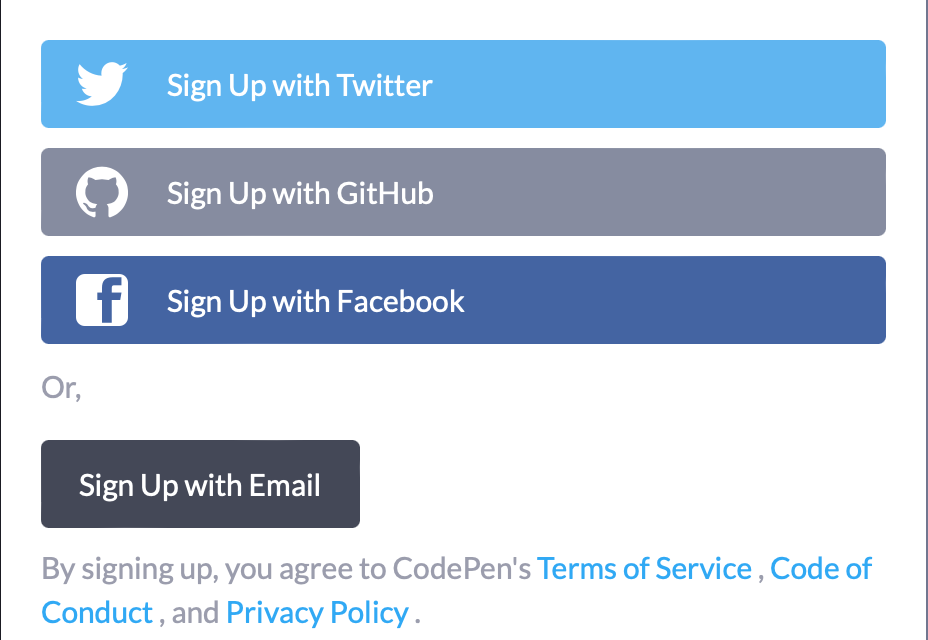
Step 3: You can sign up with your Twitter, GitHub, or Facebook account. Alternatively, you can sign up with email.
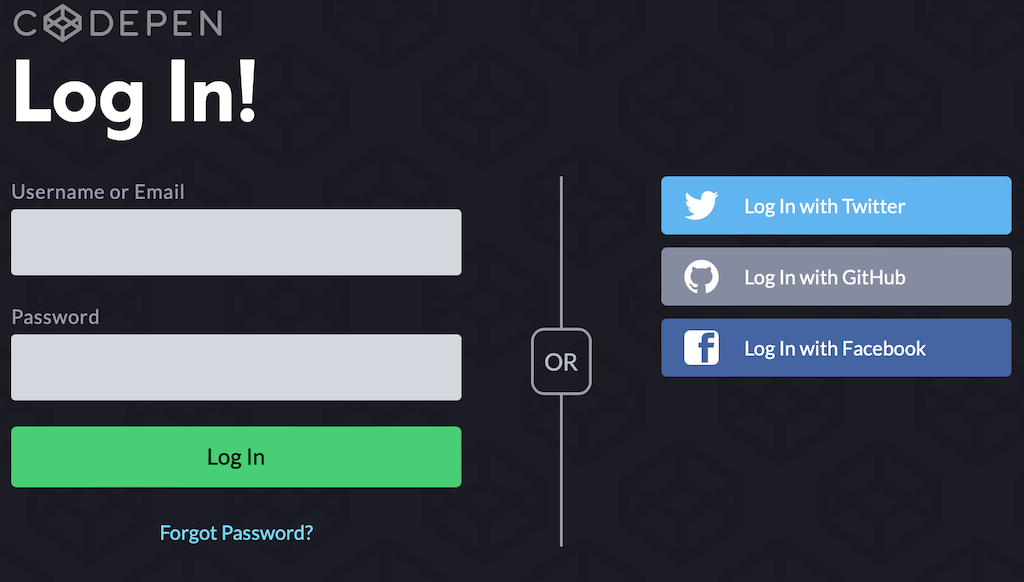
Step 4: Log In to your CodePen account.
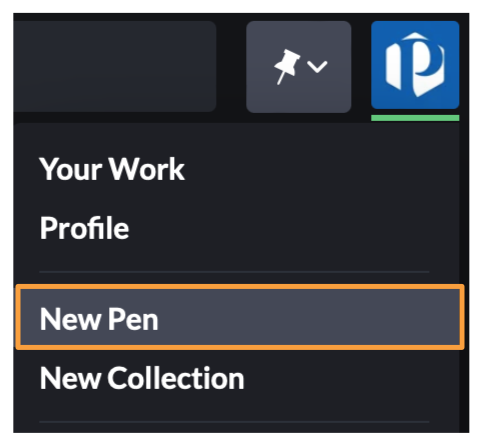
Step 5: Click on your profile image. Then from the dropdown menu click New Pen button to create a new Pen.
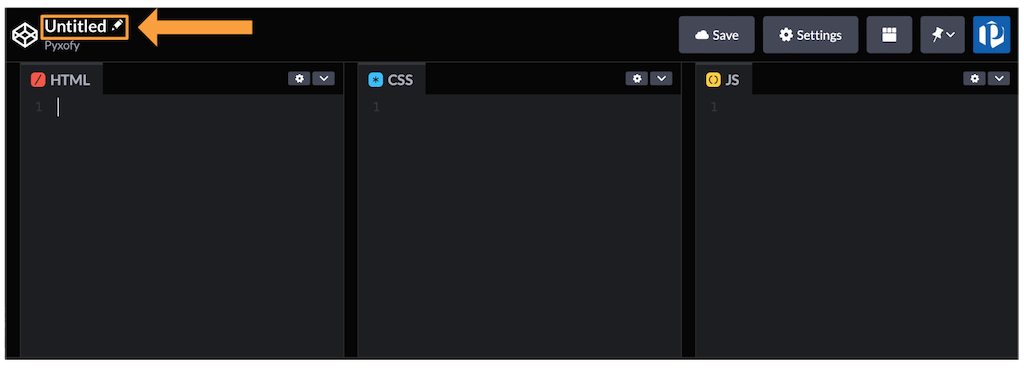
Step 6: New Pen default title is “Untitled”. Let’s change that to project-folder.
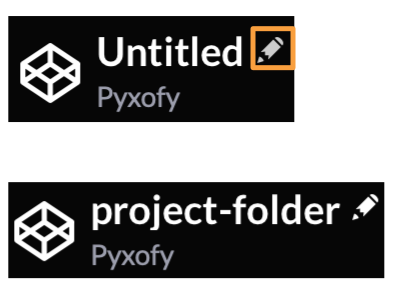
Step 7: Click on pencil icon, type project-folder, then hit enter key.
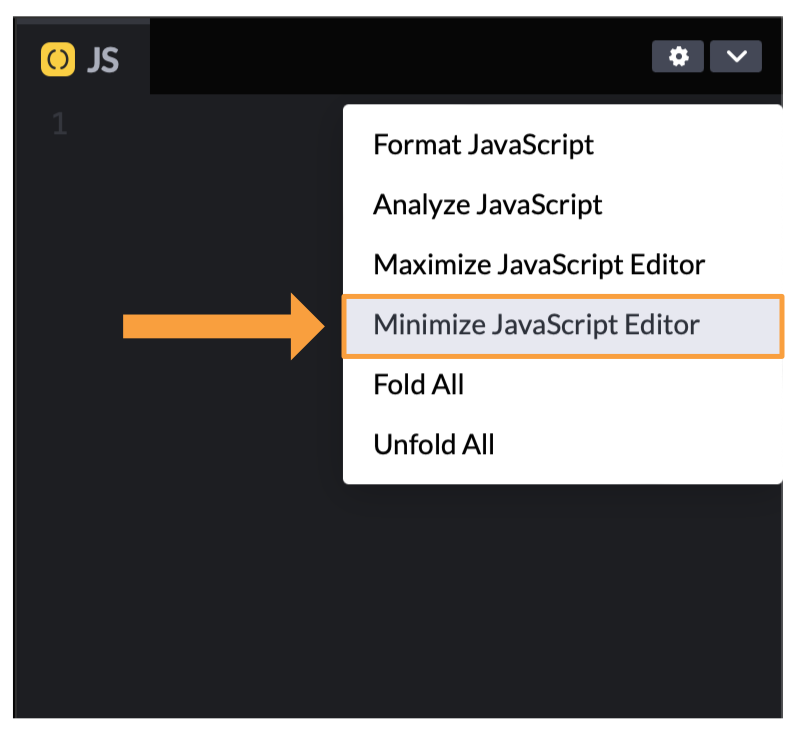
Step 8: We won’t use JavaScript code for CSS Art. Let’s go ahead and minimize the JavaScript Editor. Click ⌄ downward arrowhead beside gear icon, then click Minimize JavaScript Editor button.
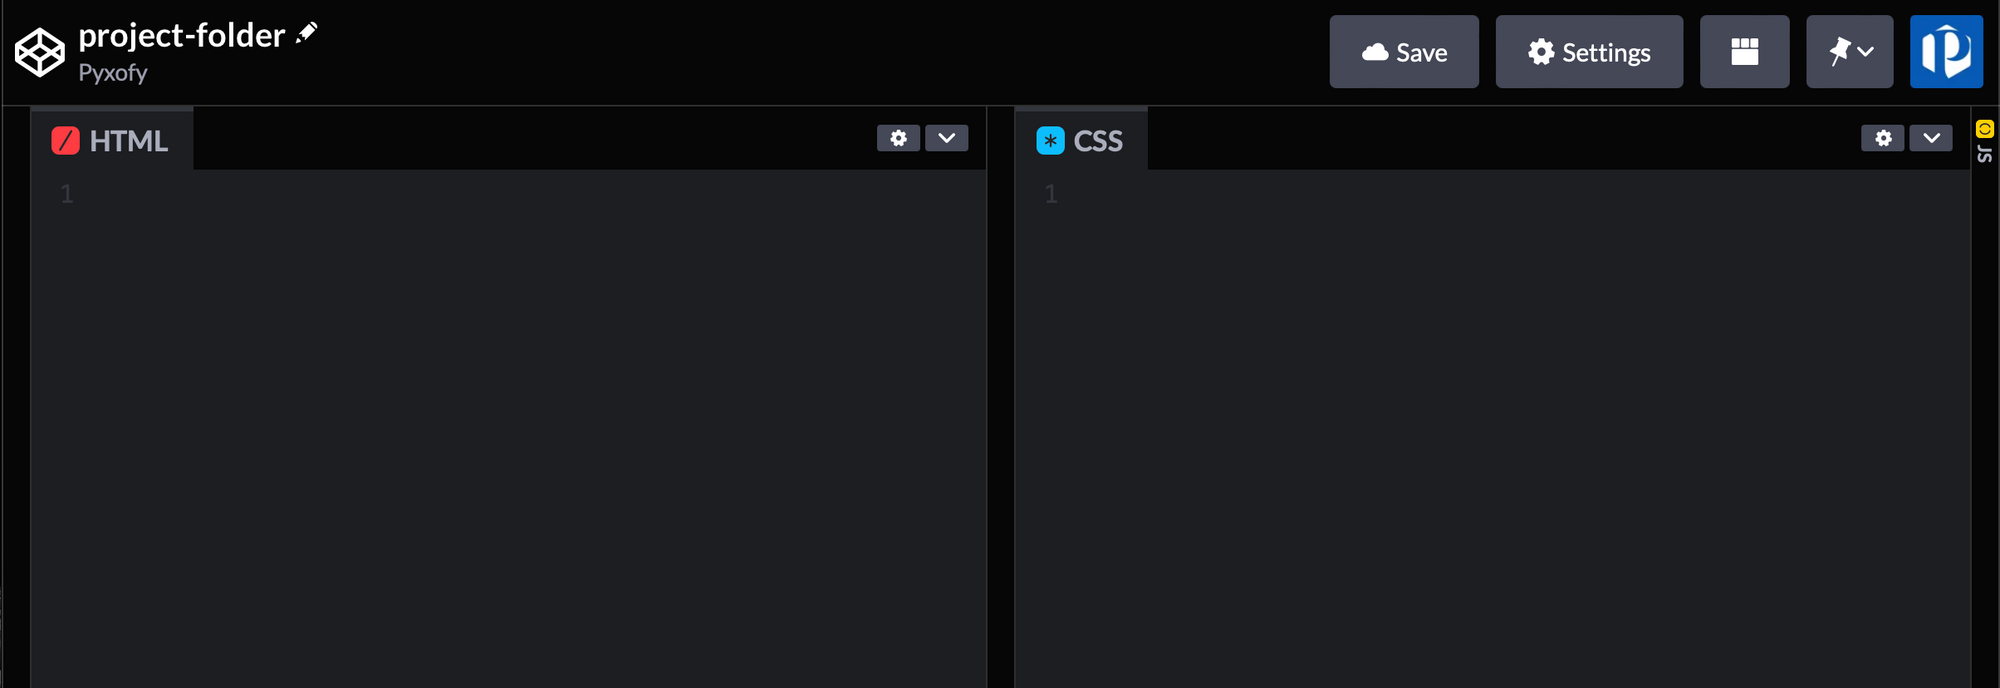
Step 9: All Done! You’re ready to start creating CSS Art.
For a quick recap of CSS, HTML and CSS Art, jump to these articles.


Conclusion
We set up our offline text editor, VS Code, and our local development environment. We set up our online IDE, CodePen.
Was that a lot of work? You bet! All this set up will pay off when we start creating CSS Art.
What do you want to create for your first project? Will it be a simple illustration, maybe a manga character, or a full-blown work of art?
Let us know! Give us a quick ping on Twitter @pyxofy, on LinkedIn or Facebook.
Hope you liked this article. Kindly share this article with your network. We really appreciate it.


